How to share a document
The instructions below apply to all Office-documents (either opened in their web app or their desktop app) as well as all documents that are opened in SharePoint’s file viewer (see this page for file types that are currently being supported for previewing).
- Click on the “Share” function, situated on the top right corner of your document:

- A document sharing form pops up. There are slight differences in the form, depending on which application you use. The screenshot below is from an Office desktop app:

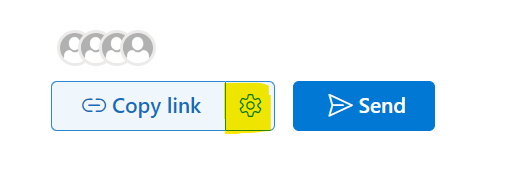
- If you click on the link settings, in the bottom of the form (the gear icon), you can now specify who you want to share the document with:
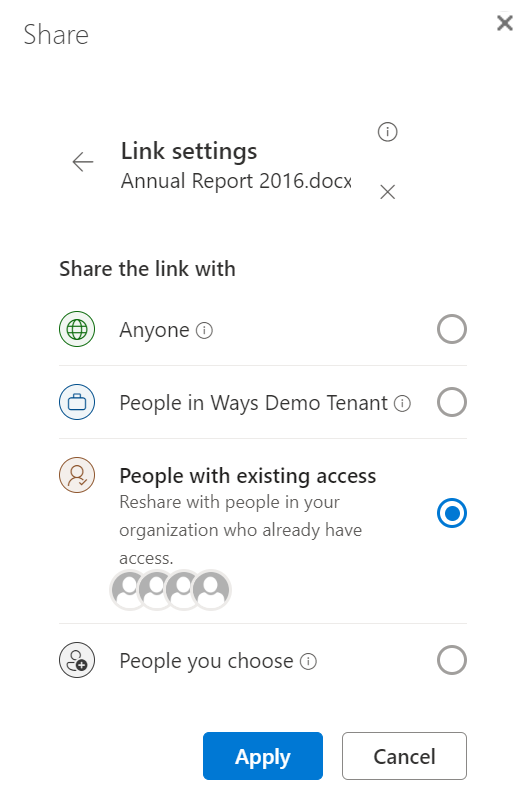
- Select the type of link that you want to create (share):
The sharing link types are described further down in this article. - Select how you want to share the document (send an e-mail, copy the link to your clipboard or add the document as an attachment in an e-mail).
The sharing methods are described further down in this article.
Sharing link types
These are the different sharing link types that you can select:
Anyone
- This option is only enabled if your organization allows sharing anonymous links and the workspace allows external sharing (the site’s sharing setting is set to “Anyone”).
- Use this option when you want to share with people (internal or external users) and are comfortable with them passing the link around to other people, inside or outside your organization.
- An “Anyone” link is a transferrable, revocable secret key. It’s transferrable because it can be forwarded to others. It’s revocable because by deleting the link, you can revoke the access of everyone who got it through the link. It’s secret because it can’t be guessed or derived. The only way to get access to the document is to get the link, and the only way to get the link is for somebody to give it to you.
- Authenticated users will not be able to see the document from SharePoint search unless they first access the document through the link. After this, the document will be shown, for the user, in SharePoint search.
- With this link you do not need to be signed in to Microsoft 365 and therefore you will be considered as an anonymous user. Any edits on the document by anonymous users will update the document with “Modified by” = “Guest contributor”.
People in tenant
- Use this option when you want to share with someone in your organization (M365 tenant) and are comfortable with them passing the link around to other people inside your organization, but when you want to ensure that the link won’t work for external users.
- A “people in tenant” link is a transferrable, revocable secret key. These links only work for people within your organization. When somebody opens a “people in tenant” link, they need to be authenticated as a member in your directory. If they’re not currently signed-in, they’ll be prompted to sign-in.
- Authenticated users will not be able to see the document from SharePoint search unless they first access the document through the link. After this, the document will be shown, for the user, in SharePoint search.
People with existing access
- Use this option when you want to share a document link with someone that already has access to the document. This option is basically the same as copying the link address of the document.
- This option does not change any permissions on the document.
People you choose
- Use this option to share with people inside or outside your organization but when you want to make sure it doesn’t work if they forward it on to others.
- A “people you choose” link is a non-transferable, revocable secret key. A “people you choose” link will not work if it’s opened by anybody except for the person specified by the sender. The recipients of the link will need to authenticate as the users specified in the sharing option.
- The recipients of the “people you choose” link will not be able to see the document from SharePoint search unless they first access the document through the link. After this, the document will be shown, for the user, in SharePoint search.
- To be able to add external users, your organization must allow external sharing and the workspace must allows external sharing (the site’s sharing setting is set to “Anyone”, “New and existing guests” or “Existing guest only”).
Sharing settings
After you select what form of document link you want to create, you can choose what the users can do with the link by defining some options under the “More settings” section. The options below vary, depending on the link type. If you selected the “People with existing access” option, you will not get any other options to set: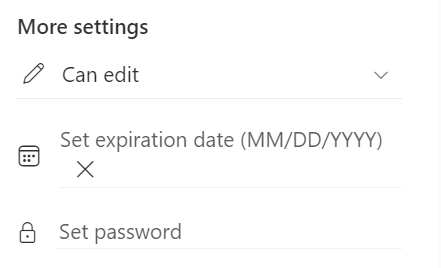
- Type of access: when you click on the first dropdown in the more settings section, you can select what type of access you want to share (can edit, can review, can view or can’t download):

- Set expiration date: You can set an expiration date after which the link will stop granting access. The maximum expiration date is 730 days (2 years) but your organization may require that “Anyone” links expire after a shorter period of days. In any case you can set an expiration date that is shorter than the maximum period.
- Set password: only available for “Anyone” links. The users will just be able to access the document if they get the password that you choose. The password will not be sent along with the mail that is sent, so you will have to share it with them separately.
Sharing options
There are 4 sharing options described below.
Option 1: Send link
- Add your recipients in the “Add a name, group or email” field and optionally add a personal message in the “Add a message” field:

- When you click on the “Send” button, you will get a confirmation that the link has been sent in an e-mail.
Option 2: Copy link
If you click on the “Copy link” button, the document’s link will be copied to your clipboard and you can now, for example, paste the link inside another document:
Option 3: Send link in Outlook
If you click on the ellipsis icon and then click on the “Send link in Outlook” link, the document’s link will be added in a new e-mail body:
Option 4: Send a copy (send the document as an attachment)
This option is only available when sharing from the Office desktop apps. If you click on the ellipsis icon and then click on the “Send a copy” link, the document will be added as an attachment in a new e-mail. You can choose to send the document in it’s original format or to first convert it to PDF and then attach it: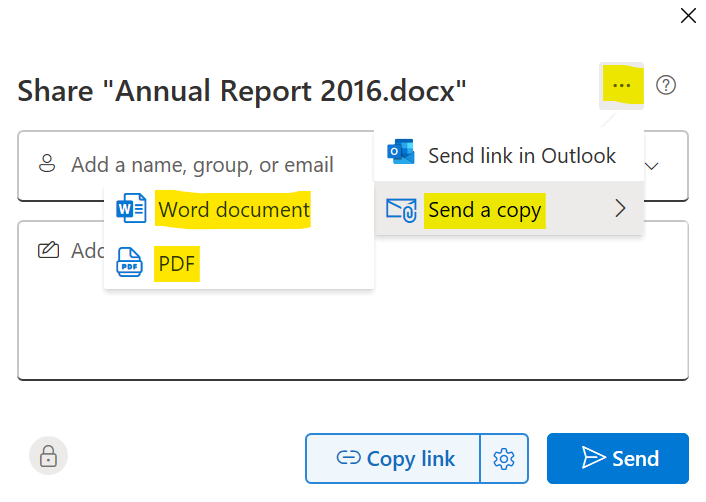
How to see who have access to a document through a shared link and how to revoke a shared link
You can view a document’s available shared links, revoke access to the document or see who the document has been shared with by following these instructions:
- Click on the document’s “Share” function:
- Above the “Copy link” and “Send” buttons, click on the icons for individuals:

- Click on the “Links” tab, to see a list of all the shared links with information about the links:

- To revoke a shared link, click on the “Recycle bin” icon to the right of the link:

- To change the settings of a shared link, click on the “Settings” icon to the right of the link:

- To revoke a shared link, click on the “Recycle bin” icon to the right of the link:
Forget manual sharing with MetaShare
MetaShare makes it easy to configure your workspaces with correct permissions from the beginning, as well as for workspaces you create in the future. That way, you can avoid the headaches that come with document-level permission scopes.